Thursday, October 28, 2010

Boxed costumes and wax candy...a spooky trip down memory lane


This time of year always reminds me of those wonderful Halloweens of my childhood, growing up in South Louisiana in the gloriously cheesy 70's.  Every year, we’d anxiously await the delivery of the Halloween costumes at our local TG&Y store. Now, I’m not talking about these fancy, schmancy, satiny, multi piece fabric costumes that kids today wear. I’m talking about the wonderful, glorious boxed vinyl costumes!!! They'd be neatly stacked on the shelves, and we’d spend what seemed like hours scouring them to find just the right one.
I absolutely remember wearing this very same witch costume.


Now, for those of you who were lucky enough to grow up in the 70's and wear these costumes, you know that the real challenge is in the proper wearing of the mask. Never, in the history of boxed costumes, have the eye and nose holes actually line up properly on your face. Now, keep in mind, I grew up in the humidity capitol of the world, so Halloween was very often summer like. Still, we’d wear those masks until they were stuck to our sweaty, sticky faces, constantly sticking our tongues through the mouth hole 'cause, well, that was half the fun of the mask. 

Kids today don’t know what it’s like to go home, dump your pumpkin out and scrounge through your loot to find wax soda bottles (did they even have a flavor?), candy cigarettes that actually puffed “smoke”, beautiful Angelina Jolielike red lips or scary fangs.  We were lucky if we had a few pieces of chocolate, and those were to be savored and hidden from your siblings. 


This Sunday night, when the sun goes down and the ghouls come out, I'll dump the $1,000 worth of premium chocolates that I've bought into a big bowl and hand them to the kiddies.  But I'll know in my heart that there's nothing like a bottle of wax and a sticky plastic mask.


Wednesday, October 27, 2010

Wilton Cake Decorating - Course 1, Class 3


Tonight was cupcake and flowers night.  We each had to bring 6 uniced cupcakes to class and predyed icing....like about 8,000 containers of it.  No seriously, 5 different colors, but it felt like 8,000 when we were mixing and dying.  Remember, my daughter, Meg and I are taking this class together, so we're making double everything.  We opted for Devil's Food cupcakes because well, it's chocolate...need I say more?

Wilton Decorating Basics Student Kit
Wilton Beginner's Cake Decorating Kit
We practiced drop flowers, rosettes, shells (surprisingly more difficult than you'd imagine), pompon flowers (much easier that I expected) and leaves.  We spent most of the class practicing these tequiques using the little clear plastic templates that came with our Beginner's kits.  You just slide the
desired template under the protective plastic coating and pipe away.  When you're finished, wipe off and start over.  Really super easy.  FYI, I'm pretty sure it's frowned upon to lick the flowers off the plastic during class...just saying.

Shaggy Mum

We also practiced filling our cupcakes.  I love this and it's unbelievably easy to do.  I had some chocolate Bavarian cream left over from last week's class, so Meg and I used this and our cupcakes were yummmmmy. 

PomPom flowers


The PomPom flowers are done by placing a square of wax paper onto a rose nail and piping the flower directly onto that. Once you finish, you gently remove the flower and allow it to dry or "crust" before placing it on your cake or cupcake.


Finally, it was time to actually decorate our cupcakes, but just like last week, our 2 hours was just about up and the instructor was ready to head home.  We decorated a few, de-iced ourselves, packed up our supplies, then headed home to finish up. 

Got home, pulled everything out of our bags and proceeded to destroy my kitchen.  Now, this is the mess they don't tell you about when you sign up for the class!  Icing, icing everywhere.  I'm beginning to see it in my sleep.  AAACCCKKK! 

Seriously, we are thoroughly enjoying the classes, I just wish we had more time to actually decorate in class.  Stay tuned for next week...the grand finale!  We'll be learning both the Ribbon rose and the Wilton rose and fully decorating our cakes...flowers, trim, etc.  Yikes!!  Cake Boss, here we come.


Monday, October 25, 2010

It's time for us to sit a spell and dream...


It's a day like any other. After a long day of work, and a stop at the gym, I walk in the door and head straight to the room to drop my gym bag and purse, take off my shoes and slip on my flip flops.  It's a daily routine that would put Mr. Rogers to shame. I grab the mailbox keys and the jingle jangle signals my trusty Yorkiepoo, Lola, to come barrelling through the house and out the door with me. While she sniffs for evidence of recent visitors, I grab the mail...ho hum...bills, junk, circulars...wait...there it is....the November issue of Southern Living. Being an unabashed holiday NUT, I wait all year for the November and December issues of my favorite magazines! Yeee Haaaaaaa!!!

Now, I don't know about y'all, but I have a certain routine with magazines. I sit down, get all comfy and flip through page by page taking it all in.  I'll devour the pictures, read the captions, glance over the wonderful places to visit and drool over the recipes, but that's it....I won't read an entire article just yet. It's a rare occasion that I get to actually sit down and read an entire magazine in one sitting....like...uh, never. So, I have to at least absorb what this particular edition has to offer.  When time finally permits, I'll sit down 15 minutes here, 30 there, and read the various articles, front to back.

I may never visit the wonderful places mentioned, never decorate my home as beautifully and certainly never try all of the mouth watering recipes, but for a while I can certainly dream about doing all of it.

Better Homes and Gardens - November 2010The November issues historically bring promises of fall, mums, pumpkin pie, turkey and families sitting around the table laughing and giving thanks for being together another year.  As I wait for my November issue of Better Homes & Gardens to arrive (and seriously, we're at the end of October...where is it?), for the hundreth time, I'll mentally plan our annual Thanksgiving get together.
 
Now...when will those December issues arrive?  I already have visions of sugar plums dancing in my head.

Wednesday, October 20, 2010

Wilton Cake Decorating - Course 1, Class 2

I have spent the vast majority of my life rushing off to work, then rushing back home to cart my girls around to dance classes, guitar lessons, softball, basketball, soccer, volleyball...you name it.  I have loved every second of it (well mostly...), but now that they're in college and law school, I find myself with free time...and I have no clue what to do with myself.

In the spirit of finding "me" time, my eldest daughter, Megan, and I have decided to take cake decorating classes.  Meg is in her last year of law school and needs to do something other than sit hunched over her desk staring blindly at law books, so this was the perfect thing for both of us. 

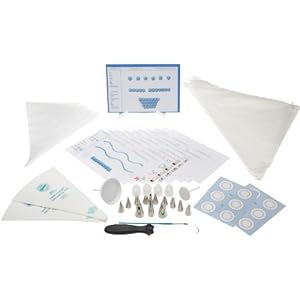
We signed up at our local Michael's and began classes last week.  Week 1 was basically informational.  We had to each bring 6 sugar cookies and icing to class to practice making stars.  We bought the pre-made cans of Wilton White Decorator Icing and found that it was too stiff to work with...won't be buying that concrete again.  Week 1...done!

Week 2 required us to each bring one 8" or 9" cake to class, and 2 batches of icing (one mixed to a thin consistency for icing the cake, one medium consistency for decorating).  Since Meg was out of town for the weekend, all of the baking/prep work became my job.  Hmmmm....out of town....coincidence....I think not.  Anyway, I wasn't in the mood to do any big, take everything out of your pantry, run to the store because you forgot to buy something, curse at the Gods, completely from scratch cake, so I wimped out and bought a box of Duncan Hines French Vanilla.  Hey, this course isn't about baking the cake, just decorating it...cut me some slack.  Our instructor actually recommended Duncan Hines over other brands, so there!  I also bought a pre mixed chocolate Bavarian cream filling which came in sort of a long, clear bladder.  The chore was in mixing 4 separate batches of frosting (4 lbs. of confectioners sugar...yikes) and getting them all dyed to the colors we'd want to use in class, but I got it all done in plenty of time to watch the Saints whoop up on the Buccaneers.  Can I get a Who Dat?

When we got to class, we practiced a few decorating basics, then we were off and running.

1.  First we dragged out our cake levelers and began to level and tort our cakes. 

2.  Got that done and piped a dam around the outside rim of the bottom layer to prevent the filling from bleeding out of the cake.  Piped in and spread the chocolate Bavarian cream, then plopped the top layer down.  

3.  Next, we put on a very thin crumb coat of icing.  After this, you must wait a few minutes for it to "crust", then take a Viva paper towel (Viva is the only one without a pattern, and smooth is what you're shooting for), and gently lay it across the top of the cake and, using your hands, begin to smooth the Viva over the icing, including the sides.  This is not a Wilton approved technique, but the instructor shared it with us and it sure does work....well, someday it'll work.

4.  Now it's time to put your final coat of icing on.  We were told to be generous with the icing, and I come from the school of thought that cake is merely a tool we use to consume icing, so I had no problem with this instruction.  Apparently, I went a bit overboard (who me?), because it took forever for my icing to dry enough to "crust".  Actually, it never did quite dry.  Then you go through the entire Viva paper towel process again and make the icing so smooth it almost looks like fondant.  As I said, I had too much icing (go figure), so mine (the pink cake) didn't come out perfectly smooth.  See how it's kind of lumpy and irregular.  Meg's (the white cake) on the other hand, came out beautifully.  The kid's trying to show me up!

5.  Finally, it's time to decorate....but we only have about 30 mins. of class time left...aarrgghh!  Take a sheet of wax paper and lay it over whatever design you choose to put on your cake.  Use clear decorator gel (or really any color that works for you) to trace the design, then flip the wax paper over onto your cake and trace the gel with your fingers onto the cake.  Voila....your design is now on the cake.

6.  Using tip #12 and our dyed medium consistency icing, we began piping our designs onto the cake...fast...because time was running out...and the instructor was obviously ready to go home....crud...this isn't turning out how I wanted.  So, Meg and I threw our stuff into our bags and headed home to finish our cakes.  Honestly, by that time I was kind of over it and ready to just call it a day, but I had to get this darned thing done.  I would've liked to have been able to do the decorating with the instrutor there to tell me what I was doing wrong, but no big deal.  I'm anxious for next week...flowers!

Here's the finished product.  Can you tell which purple and gold, Mike the Tiger, Death Valley, SEC powerhouse school Meg graduated from?
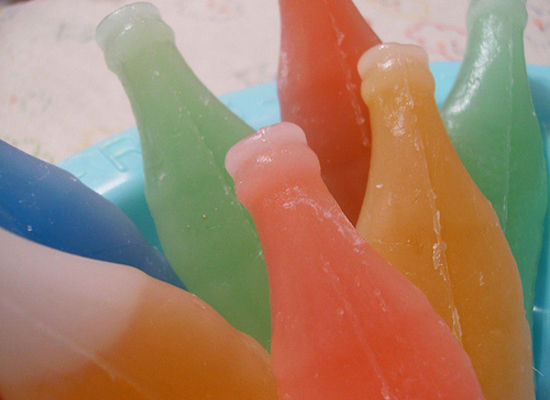


Monday, October 18, 2010

Fall Wreath

I decided to make a quick fall wreath for my naked front door.  This is super easy, even if you consider yourself "craft challenged".  Believe me, I'm no Martha Stewart and I can do this.  The hardest part is deciding on the look you're going for and picking out the flowers and other decorations.  I spend forever trying to make up my mind. I come from a long line of crafty, but indecisive women, and I'm proud to say that it's a curse  I've apparently handed down to my two daughters.

Anyway, let your imagination run wild and give wreath making a try.

SUPPLIES:

2 grapevine wreaths
Glue gun and glue sticks
Floral wire
Wire cutters/scissors
Flowers/decorations of your choosing
(if you're wondering what the paper plate is for, it's what I rest
my glue gun on to catch the inevitable gloppy drips)


Start off by wiring the two grapevine wreaths together in 4 places (think points on a compass....north, south, east, west). 
I like to use 2 wreaths to give a more lush appearance.


Place your more willowy, flowing flowers on first, so they'll be in the background of your display.  I tucked mine through the grapevine wreath and also used floral wire and hot glue.  You could probably omit the floral wire if you just want to glob on more glue.


Add your second layer of decorations (fall leaves in my case).  I just cut them and placed them on the wreath to see what configuration I liked, then I went back and hot glued each leaf in place.  If your wreath is going to be outside, be very generous with the hot glue.  You might also want to have some ice water handy for the inevitable "Ouch...#$*%" moment when the glue drips onto your fingers. 
Uh....not that it's ever happened to me....I'm just saying....


Well, I got carried away and forgot to snap pictures of me adding the rest of the flowers and the gourds/pumpkins, but it's basically the same process.  Lay them out, see what looks best to you, and then glue the heck out of the little buggers.  

Here's the finished product


You can see that I added several different types of flowers. 
I like different styles, colors and sizes to add dimension and interest. 


Love the little gourds and pumpkins. 


You can do this!! 

Sunday, October 17, 2010

Welcome!

Welcome to my first blog post!  In the spirit of true rambling, my sweet hubby, Steve (also known as The Professor because he can fix anything and has a head full of knowledge that has just seemingly appeared through osmosis) and I just returned from a quick get away to Ft. Walton Beach for our 26th anniversary.  We had a wonderful time, and as usual, he almost had to drag me from the beach.  I'm already plotting our return.  A picture tells a thousand words, so....

The view from our balcony


Steve relaxing on the beach.  This was actually the first time we've ever gone to the beach in the fall, and I must say it was wonderful...cooler temps, lower crowds.


Having a glass of vino, on the beach, watching the sunset with your honey. 
Does it get any better???


As the sun sets on our first day


Now that's a good husband.  Going out to set up our little slice of paradise.


This little guy was sunning on the sand next to me


Enjoying a pre-dinner Flirtini at Marina Cafe (if you ever find yourself in the
Ft. Walton/Destin area, you MUST eat here...fabulous)http://www.destinchops30a.com/marinacafe.html
...and since some of you have asked, according to Marina Cafe, a Marina Flirtini consists of Raspberry Vodka & Cointreau,
Pineapple & Cranberry Juices topped with Champagne. 

And while I'm at it, boy can you tell that I'm much more dilligent about putting sunscreen on my face than elsewhere. 
Yikes, I look like a ghost in that picture...I'm blaming the flash.


Woke up early to catch the sunrise on our last day


Caught the gulls doing their morning grooming


Okay, I don't know what kind of bird this was, but he was a big guy judging
from this print.  That's my footprint beside his, and I wear a size 9 shoe!


Until next time....